Usage Procedures
Properly Wearing the Helmet
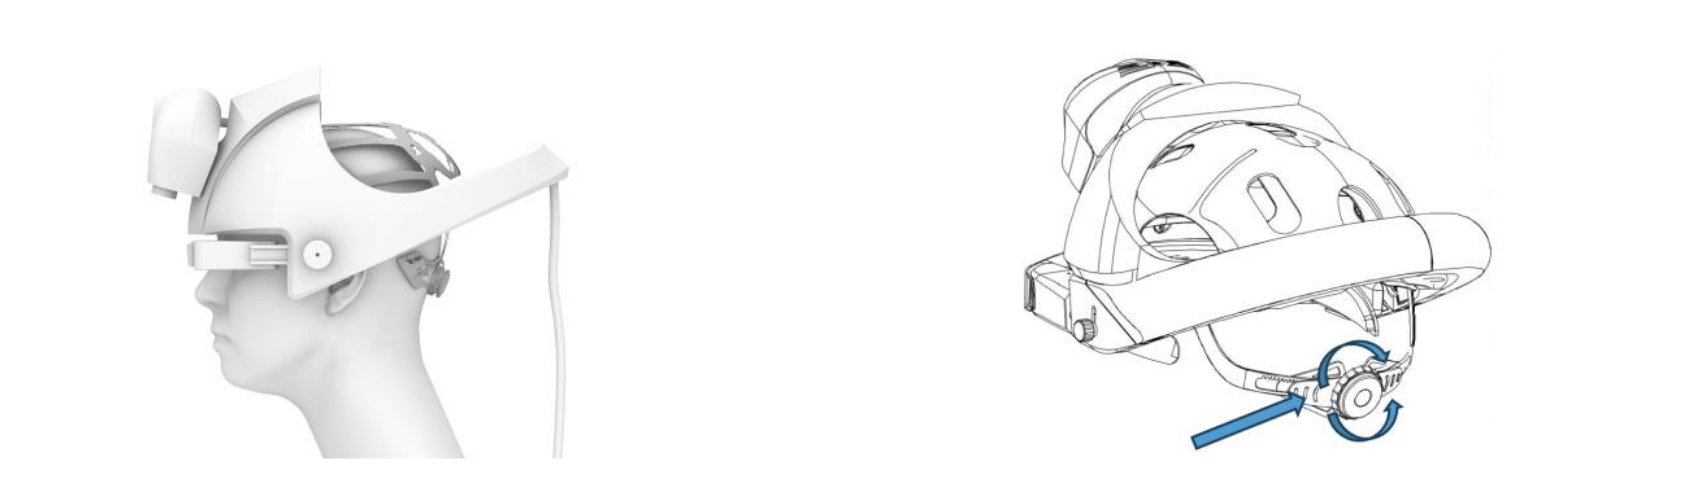
Make sure the Orisview helmet is worn correctly; this is essential for comfortable and prolonged use.
The Orisview helmet is designed to fit a wide variety of face and head shapes, taking into account interpupillary distance (IPD), forehead width, head length, and head width, thus covering nearly all women and men of various ethnicities.
Remove any hair or head accessories (such as bands or elastics) that could prevent the helmet from fitting well around the head.
The package also includes four sizes of pads to insert into the helmet shell. If the installed pads do not seem to fit well, try replacing them with a larger or smaller size depending on the case.
NOTE

BE CAREFUL NOT TO HIT THE HELMET WITH BLUNT OBJECTS, PARTICULAR ATTENTION SHOULD BE PAID TO THE VISOR AND CAMERAS. DO NOT TOUCH OR SOIL THE CAMERAS, VISOR, OR LIGHTS WITH YOUR HANDS.
How to Attach and Remove the Darkening Filter
Depending on the room lighting conditions, it may be necessary to mount the darkening filter. Depending on the configuration, two types of darkening filters are available: one with fixed darkening and one electronically controllable. The electronically controllable darkening filter has 2 transparency levels from 25% to 85% semi-transparency.
Attaching the Darkening Filter
Attach the darkening filter to the magnetic parts ⓐ by pushing it to the end. You will hear a click when the filter is perfectly attached. The magnetic contacts are equipped with digital contacts for the operation of the electronic darkening filter.

Removing the Darkening Filter
Carefully remove the darkening filter by holding it in the center and pulling it gently without forcing. The attachment is magnetic and requires only a small initial force.
NOTE
BE CAREFUL WHEN INSERTING AND REMOVING THE DARKENING FILTER SINCE IT IS CLOSE TO THE LENSES AND VISOR. IF THE FILTER IS PUSHED OR PULLED WITH TOO MUCH FORCE, IT COULD DAMAGE THE HELMET. DO NOT APPLY EXCESSIVE FORCE TO THE FILTER.
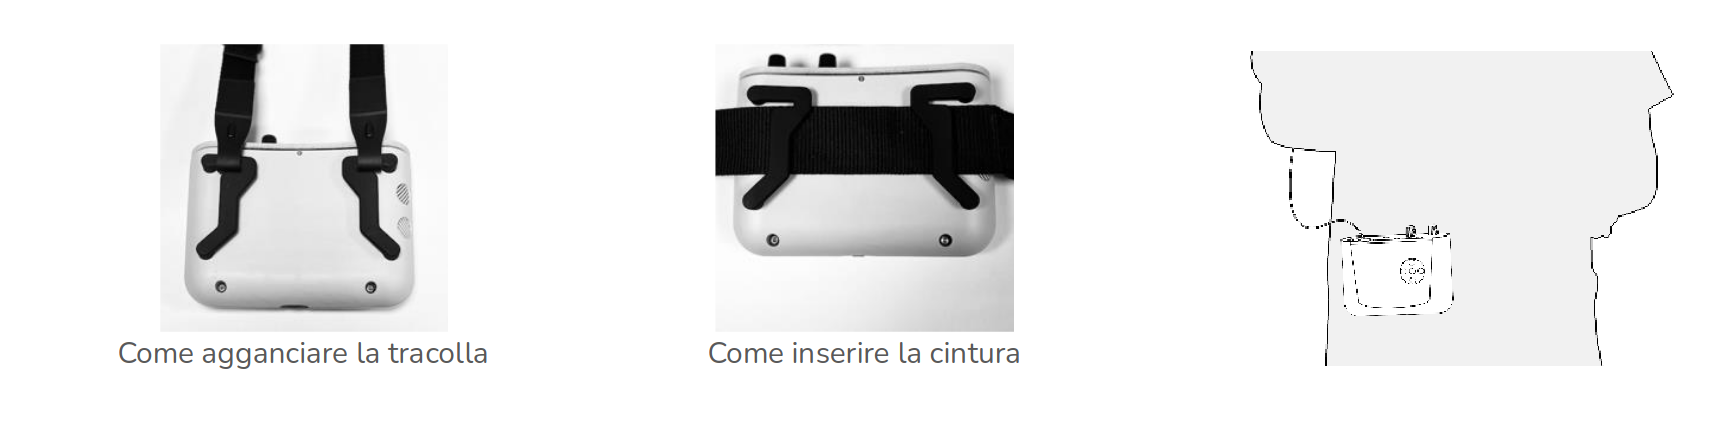
Properly Wearing the Console
Install the Console on a belt or shoulder strap (accessories included in the package) with the screen and joystick side facing outward. Make sure it is securely fastened.
Connecting to the Orisview System
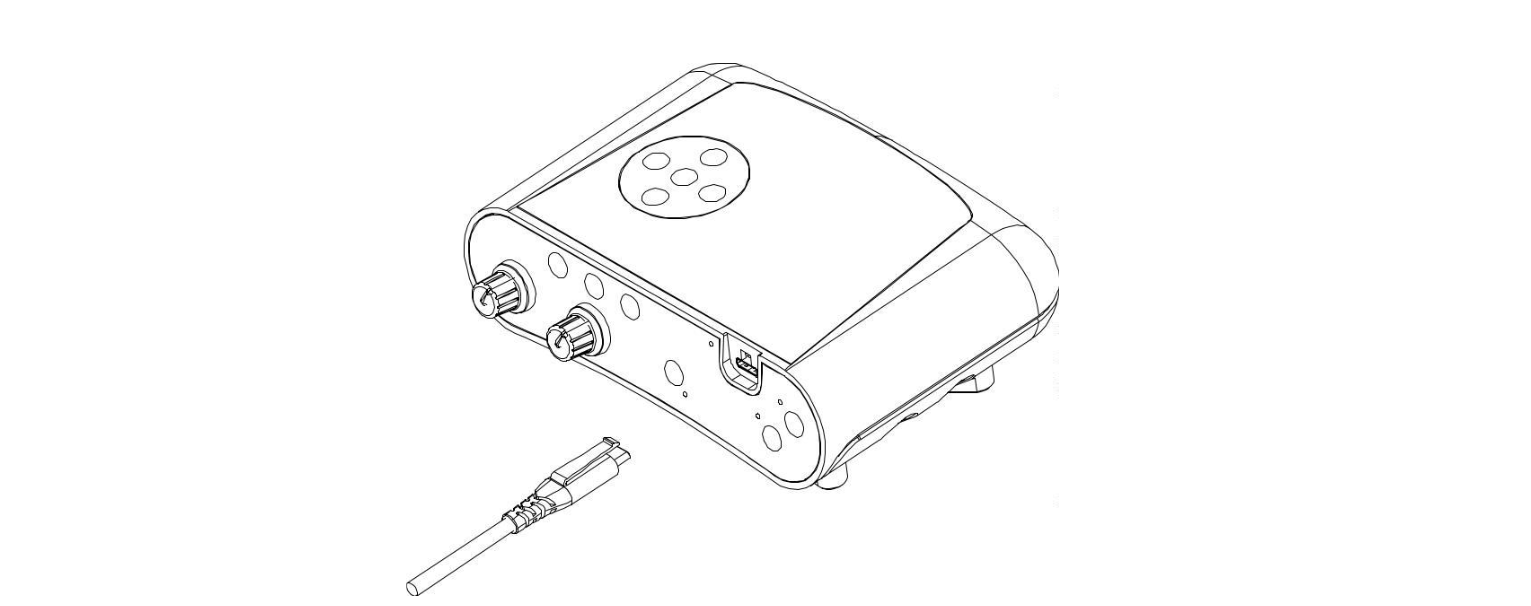
Method for Connecting the Helmet to the Console
Prepare the Orisview helmet for connection with the Console. Make sure not to damage the helmet when attempting to connect it to the Console.
Connect the helmet cable to the port on the upper side of the Console.
The cable has a retention connector that locks it in place to avoid unwanted disconnections. Be careful when disconnecting it — do not pull the cable without pressing the retention lever.
Perform the helmet-to-console disconnection operation when the Console is OFF.
NOTE
WHEN CONNECTING THE HELMET CABLE TO THE CONSOLE, MAKE SURE THE CONNECTOR IS FULLY INSERTED. IF THE CONNECTION IS CORRECT, YOU SHOULD HEAR A "CLICK" CONFIRMING THE ATTACHMENT.
Take the NFC badge included in the package; the badge enables system operation and serves as your unlock key. The badge is needed to unlock the system and must be held near the symbol on the front of the console.

Turning On the Console

NOTE
FULLY CHARGE THE BATTERY BEFORE FIRST USE.
THE CONSOLE BATTERY IS FACTORY CHARGED BELOW 30% FOR SAFE SHIPPING.
If the charge status is sufficient, press and hold the power button for a few seconds until you hear two beeps.
The green power LED on the top side of the Console next to the helmet connector will light up and slowly pulse during initialization. After initialization, it will stay steadily green.
During initialization, the touch display will show the various phases; if it turns off, it can be reactivated with a simple touch.
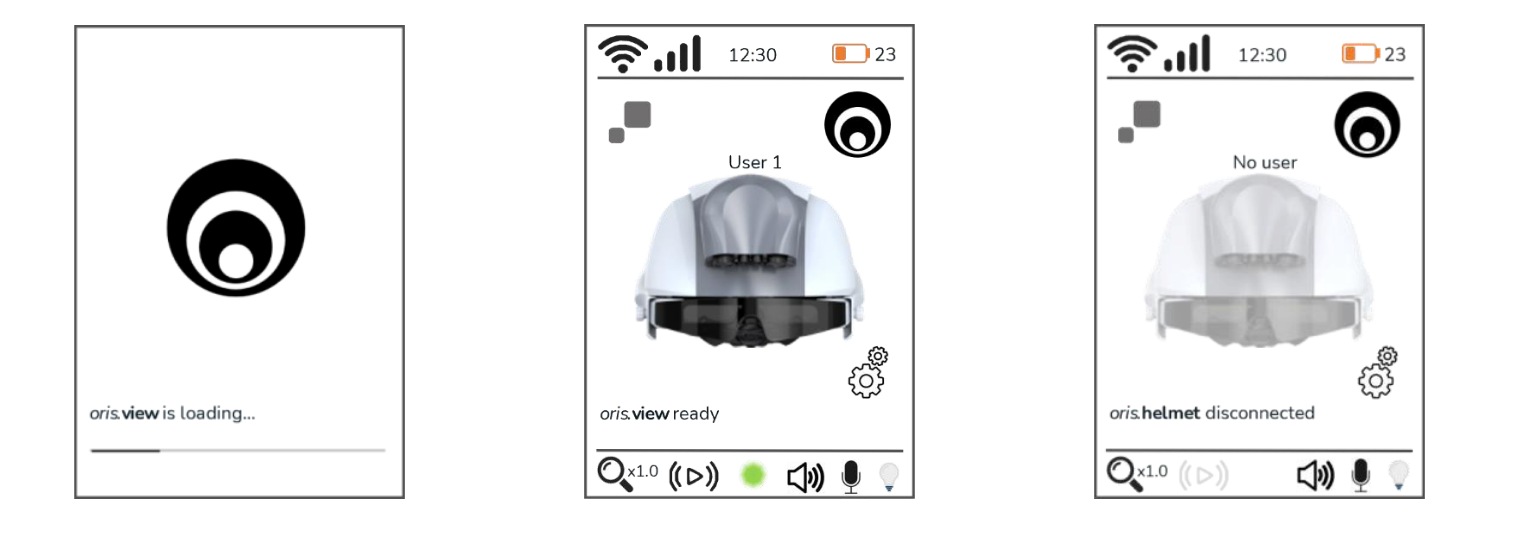
The Console display will show two types of screens during initialization, starting with the left screen that animates the initialization phases and ending with the central screen displaying "oris.view ready."
If the helmet cable is not connected, the initialization will complete with the message "oris.helmet disconnected." In this case, simply connect the helmet cable and wait about 10 seconds for the helmet initialization and the reappearance of the "oris.view ready" message.
Initialization takes about 30 seconds, and the status will be displayed on the screen. When finished, the display will show: Orisview Ready.
At the end of initialization, the 3D visor of the helmet will show the working area in focus at the ordered focal distance, while status icons described earlier will appear as overlays at the top of the visor.
Now, with the helmet worn, bring your hands to your working distance (your Orisview was factory-calibrated according to your position) and you will see them in focus in the 3D visor. The Orisview 3D visor will display in real time the area focused by the stereoscopic cameras.
If the power LED ⑬ continues blinking, the helmet is disconnected and the message "oris.helmet disconnected" will appear at the bottom left of the display.
Turning Off the Console
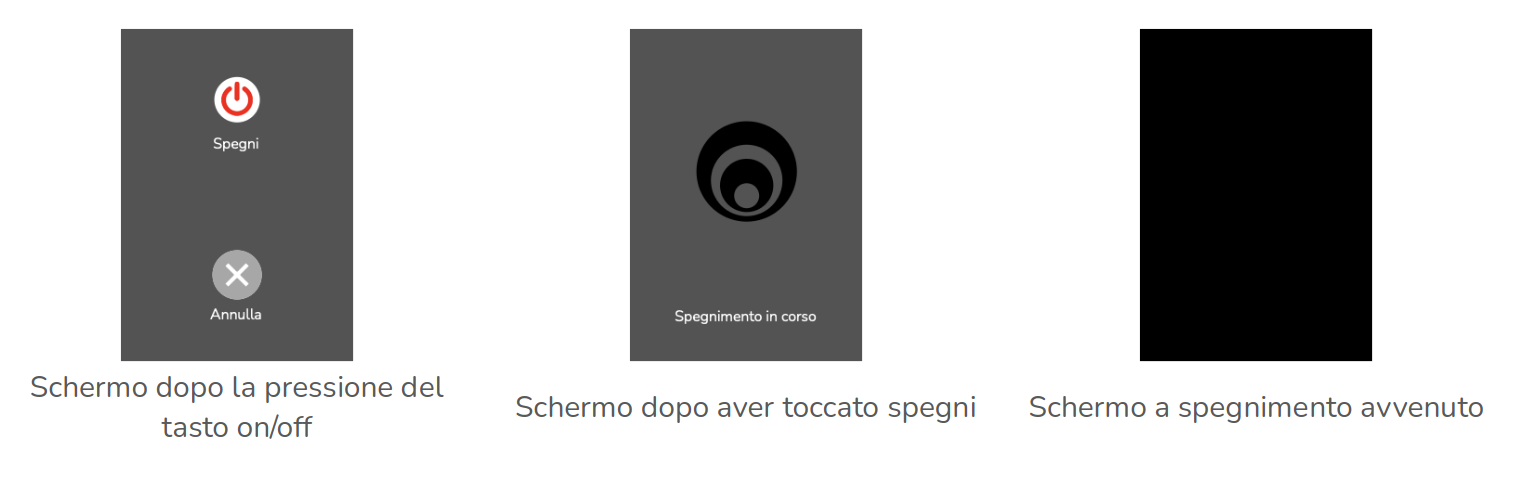
Press the power button on the lower part of the console until the shutdown screen appears, showing two circular icons — one to shut down and one to cancel the procedure.
Press the desired choice. If no icon is pressed, the system returns to normal operation, considering the power button press unintentional. If the shutdown icon is pressed, the system prepares to shut down and the procedure completes within a few seconds, with the green LED ⑭ turning off.
Locking Orisview
The system locks after 10 minutes of inactivity and to unlock it, the NFC badge must be placed near the symbol on the front of the helmet. The lock function can be disabled from the console menu.
You must have the badge to disable this feature.
Enabling and Disabling Wireless Video Streaming
You can use button ⑩ on the console to enable or disable wireless transmission. Press the button when video streaming is off (blue LED off), then wait for the blue LED ⑪ to turn on.
When the LED is on, the Orisview system is in transmission mode.
To disable video streaming, press button ⑩ and wait for LED ⑪ to turn off. Streaming can also be disabled from the Network menu of the console.

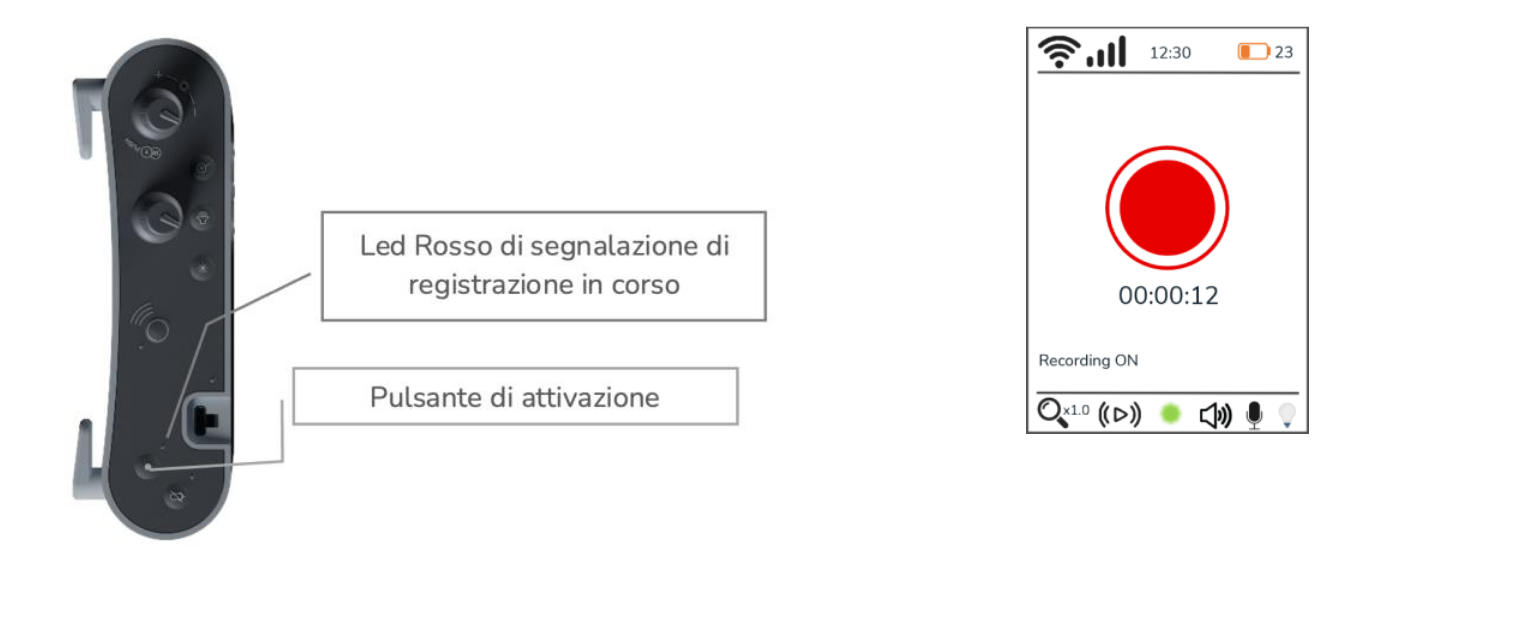
Video Recording
To record the scene on the device's internal storage, just press the button. The internal memory can record up to XX hours of full HD 3D footage.